
When your commercial refrigerator stops cooling properly, every hour counts. Whether you’re managing a busy restaurant kitchen or operating a convenience store, a walk-in cooler warm to the touch or a reach-in refrigerator not holding temperature can mean thousands in spoiled inventory and lost business. The good news? Many cooling issues have simple fixes you can check yourself in just minutes. This guide walks you through immediate safety steps, fast DIY troubleshooting, common technical causes, and exactly when to call in professional help. You’ll learn how to diagnose refrigeration problems quickly and make informed decisions that protect both your food and your budget.
Quick Safety & Food-Loss Checklist
Before troubleshooting, protect your inventory and team:
- Check internal temperature immediately – Use a calibrated thermometer. Food safety danger zone is 41°F–135°F.
- Move perishables to working coolers – Prioritize high-risk items like dairy, raw meat, and seafood.
- Document temperatures and timing – Note when cooling failed for insurance or warranty claims.
- Don’t open doors unnecessarily – Every opening raises internal temperature by 5-10°F.
- Unplug only if instructed – For most checks, keep the unit running to observe behavior.
- Look for water leaks or burning smells – These require immediate professional attention.
Fast DIY Checks (5–10 Minutes)
Your First 10-Minute Action Plan
Follow this numbered checklist to rule out simple causes:
- Verify power supply – Check breaker panel, plug connection, and GFI outlets.
- Inspect temperature settings – Confirm thermostat wasn’t bumped to warmer setting.
- Examine door gaskets – Run the dollar-bill test (close door on bill; if it pulls out easily, seal is bad).
- Clear airflow obstructions – Remove boxes or inventory blocking vents.
- Check condenser coils – Look for dust buildup on exterior coils.
- Listen for compressor – Humming sound indicates it’s trying to run.
- Look for frost buildup – Excessive ice on evaporator coils signals defrost problems.
- Measure clearances – Ensure 6+ inches of space around condenser for ventilation.
Power & Electrical Connections
Start with the basics. Confirm the unit is receiving power by checking the main breaker and any dedicated shutoff switches. Look for tripped GFI outlets, especially after cleaning or recent electrical work. If your reach-in refrigerator troubleshooting reveals a tripped breaker that re-trips immediately, stop and call a technician—this indicates a serious electrical fault.
Wiggle the power cord gently where it connects. Loose connections can cause intermittent power loss. Check for any visible damage to the cord or plug.
Thermostat Settings
Someone may have accidentally adjusted the temperature control. Verify the thermostat is set to the correct temperature—typically 35-38°F for refrigerators and 0°F for freezers. Digital controls can sometimes reset during power surges.
Try adjusting the thermostat slightly cooler and listen for the compressor to engage within a few minutes. If nothing changes, the thermostat itself may be faulty.
Door Gaskets & Seals
Poor door seals are among the most common causes of refrigeration not holding temperature. Visually inspect the rubber gaskets around all doors for cracks, tears, or deformation. Press your hand along the seal while the door is closed—you shouldn’t feel cold air escaping.
Clean gaskets with warm soapy water and check that doors close firmly without gaps. Warped doors or worn hinges can prevent proper sealing even when gaskets are intact.
Airflow & Clearances
Blocked vents inside the unit force the compressor to work harder without achieving proper cooling. Remove any inventory pressed against air vents or evaporator fan covers. Cold air needs to circulate freely.
Outside the unit, verify adequate clearance around the condenser. Most manufacturers require 6-12 inches of space for proper air intake and exhaust. Units pushed tight against walls will overheat.
Condenser Coil Cleaning
Dirty condenser coils are the leading cause of preventable cooling failures. These coils (usually on the back or underneath) must release heat to cool the refrigerant. When covered in dust, grease, or lint, they can’t function efficiently.
Turn off the unit and carefully vacuum or brush the coils. For heavy grease buildup common in restaurant kitchens, use commercial coil cleaner spray. This simple condenser maintenance task can immediately restore cooling in many cases.
Defrost System
If your evaporator coil is covered in thick ice, the defrost system isn’t working. Some ice is normal, but a solid block of ice prevents cold air circulation. This evaporator coil icing is especially common in walk-in coolers.
Manually defrost by turning off the unit and allowing ice to melt (place towels to catch water). If ice returns quickly, the defrost timer, heater, or termination thermostat likely needs professional replacement.
Ambient Temperature & Load
Extreme ambient heat strains refrigeration systems. Units in hot kitchens or near ovens may struggle during peak hours. Check if the unit cools better during cooler times—this suggests undersized capacity or poor ventilation.
Overloading the unit with warm product also overwhelms cooling capacity. Never load more than 10-15% of total capacity with warm items at once. Allow hot foods to cool to room temperature before refrigerating when possible.
Common Technical Causes
Faulty Thermostat or Temperature Control
Symptoms: Compressor doesn’t turn on/off properly, wide temperature swings, or unit runs continuously without cooling.
The Problem: The thermostat acts as the brain of your refrigeration system. When it fails, it can’t signal the compressor to start or can leave it running endlessly. Digital controls can develop electronic faults, while mechanical thermostats may have broken sensing tubes.
Risk Level: Medium. Unit won’t maintain safe temperatures but isn’t at immediate risk of component damage.
What to Do: Have a technician test thermostat operation with diagnostic tools and replace if defective. Typical repair time is 1-2 hours.
Bad Evaporator or Condenser Fan Motor
Symptoms: Unit runs but doesn’t cool, unusual noise or complete silence where fan should spin, one section cools while another doesn’t.
The Problem: Fan motors circulate air over coils. Without airflow, cold air stays trapped at coils while the rest of the unit warms. Condenser fans cool the compressor; evaporator fans distribute cold air inside.
Risk Level: High. A non-functioning fan can cause compressor overheating and complete system failure within days.
What to Do: Technicians will test motor windings and replace failed motors. Some motors can be accessed easily while others require refrigerant recovery. Repair takes 2-4 hours depending on location.
Iced Evaporator Coil
Symptoms: Poor cooling, visible ice buildup on interior coils, frost on walls, water pooling underneath unit.
The Problem: Failed defrost cycles allow ice to accumulate on evaporator coils, blocking airflow. This can be caused by defective defrost timers, heaters, or termination thermostats. Heavy ice formations act as insulation, preventing heat exchange.
Risk Level: Medium. Existing components aren’t damaged but cooling capacity is severely reduced.
What to Do: Professional diagnosis of defrost system components. Repair involves testing heaters, replacing timers, and ensuring drain lines are clear. Allow 2-3 hours plus defrost time.
Low Refrigerant Charge
Symptoms: Unit runs constantly, compressor is warm, cooling is weak but present, frost patterns are abnormal or uneven.
The Problem: Refrigerant is the lifeblood of cooling systems. Low levels mean inadequate heat absorption. This usually indicates a leak somewhere in the system—refrigerant doesn’t “wear out” or need routine refilling.
Risk Level: High. Running with low refrigerant damages compressors and can lead to complete system failure.
What to Do: Only licensed technicians can handle refrigerant. They’ll locate leaks, repair them, evacuate the system, and recharge to manufacturer specifications. Expect 3-6 hours depending on leak location.
Dirty Condenser Coils (Severe)
Symptoms: Unit runs but cooling is weak, compressor shuts off on overload, high energy bills, compressor is very hot to touch.
The Problem: Severely clogged condenser coils can’t dissipate heat. The compressor works harder, overheats, and triggers safety shutoffs. This creates a cycle of short run times with poor cooling.
Risk Level: High. Overheating will damage the compressor—the most expensive component.
What to Do: Professional deep cleaning with specialized coil cleaning solutions and pressure washing. Technicians will also check for bent fins that restrict airflow. Service takes 1-2 hours.
Failed Defrost Timer or Heater
Symptoms: Ice buildup on evaporator coils, defrost cycle never activates, unit gradually loses cooling capacity.
The Problem: Defrost timers control automatic defrost cycles that melt accumulated frost. When timers stick or heaters burn out, ice accumulates indefinitely. Most commercial units defrost 2-4 times per day.
Risk Level: Medium. Progressive issue that worsens over days but doesn’t cause immediate component damage.
What to Do: Technician will test timer operation and heater continuity. Replacement is straightforward but may require defrosting unit first. Typical repair is 1-2 hours.
Bad Start Relay or Capacitor
Symptoms: Compressor won’t start, clicking sound when unit tries to start, or compressor hums but doesn’t run.
The Problem: Start relays and capacitors provide the electrical boost compressors need to start. When they fail, the compressor can’t overcome initial resistance. You’ll hear clicking or humming but no actual running.
Risk Level: High. A compressor that can’t start will overheat trying, potentially causing permanent motor damage.
What to Do: Technicians test capacitor charge and relay function with meters. These are relatively inexpensive parts. Repair typically takes 1 hour.
Refrigerant Leak
Symptoms: Gradually worsening cooling over weeks, oily residue near coils or connections, hissing sound (active leak), compressor runs constantly.
The Problem: Small leaks allow refrigerant to escape slowly. Unlike sudden failures, you might not notice until cooling is severely compromised. Leaks often occur at brazed joints, valve connections, or from corrosion.
Risk Level: High. Leaking refrigerant is harmful to the environment, and continued operation damages the compressor.
What to Do: Professional leak detection using electronic sniffers, UV dye, or pressure testing. Repair involves brazing leaks, pressure testing, evacuation, and recharge. Complex repairs take 4-8 hours.
Restricted Capillary Tube or Expansion Valve
Symptoms: Partial cooling, frost patterns localized to one area, suction line not cold, unusual temperature differences across evaporator coil.
The Problem: These components meter refrigerant flow into the evaporator. Blockages from debris or failed valve mechanisms disrupt proper refrigerant distribution. The system may cool intermittently or unevenly.
Risk Level: Medium-High. System won’t cool properly and compressor may be damaged by improper refrigerant return.
What to Do: Diagnosis requires pressure and temperature measurements. Repairs involve system evacuation, component replacement, and recharge. Expect 3-5 hours.
DIY vs Professional Repairs: Quick Comparison
AspectDIY ChecksProfessional RepairsRisk LevelLow (no refrigerant handling)Managed (licensed, insured)Tools NeededThermometer, vacuum, flashlight, screwdriverGauges, recovery machine, leak detector, multimeter, brazing equipmentTime Required10-30 minutes1-8 hours depending on issueCost Range$0 (your time)$150-$2,500 (service call to major repair)Success Rate30-40% for simple issues95%+ with proper diagnosisBest ForDirty coils, door seals, settings, basic power issuesRefrigerant work, compressor issues, electrical faults, component replacementLimitationsCan't diagnose refrigerant problems or replace sealed componentsHigher upfront cost (but prevents further damage)
When to Call a Refrigeration Technician
Clear Triggers for Professional Help
Don’t wait if you observe any of these conditions:
Immediate Call Required:
- Burning smell or visible smoke from compressor area
- Electrical sparking or repeated breaker trips
- Refrigerant hissing or chemical odor (sign of active leak)
- Standing water with no obvious source
- Complete system shutdown with no power to controls
Call Within 24 Hours:
- Temperature above 50°F despite running compressor
- Compressor cycling on and off every few minutes
- Unusual loud noises (grinding, squealing, banging)
- Ice buildup returns immediately after manual defrost
- Any issue after your DIY checks show no simple cause
Schedule Service Soon:
- Gradual temperature rise over several days
- Condenser maintenance or deep cleaning beyond your tools
- Routine maintenance is overdue (2+ years)
- Energy bills increasing without usage changes
What Professional Diagnosis Involves
A qualified refrigeration technician will typically follow this process:
Initial Assessment (15-30 min): Review history, observe unit operation, check temperature readings, and listen for abnormal sounds.
Diagnostic Testing (30-60 min): Measure refrigerant pressures, test electrical components with multimeter, check amperage draw, inspect all coils and fans, and test defrost system operation.
Root Cause Analysis: Identify the primary failure and any secondary issues caused by the main problem.
Repair Options: Present findings with cost estimates for repairs versus replacement considerations.
Typical Repair Timelines
Most commercial refrigeration repairs fall into these windows:
- Simple component replacement: 1-2 hours (thermostat, relay, capacitor, fan motor)
- Leak repair and recharge: 3-6 hours (includes leak detection, repair, evacuation, recharge)
- Compressor replacement: 4-8 hours (major repair requiring full refrigerant recovery and system evacuation)
- Defrost system overhaul: 2-4 hours (timer, heater, and control replacement)
Emergency service may be available for premium rates if you need same-day repairs to prevent inventory loss.
Preventive Tips to Avoid Warm Fridges
Monthly Maintenance Checklist
Prevent cooling failures with regular attention:
- Clean condenser coils thoroughly (or more often in dusty/greasy environments)
- Inspect door gaskets and clean with mild soap solution
- Check and clean drain lines and pans
- Verify all interior lights shut off when doors close (lights generate heat)
- Test door closure—they should close firmly on their own
- Remove any items blocking air vents
- Check exterior for proper clearance and ventilation
- Wipe down interior to prevent spills from affecting airflow
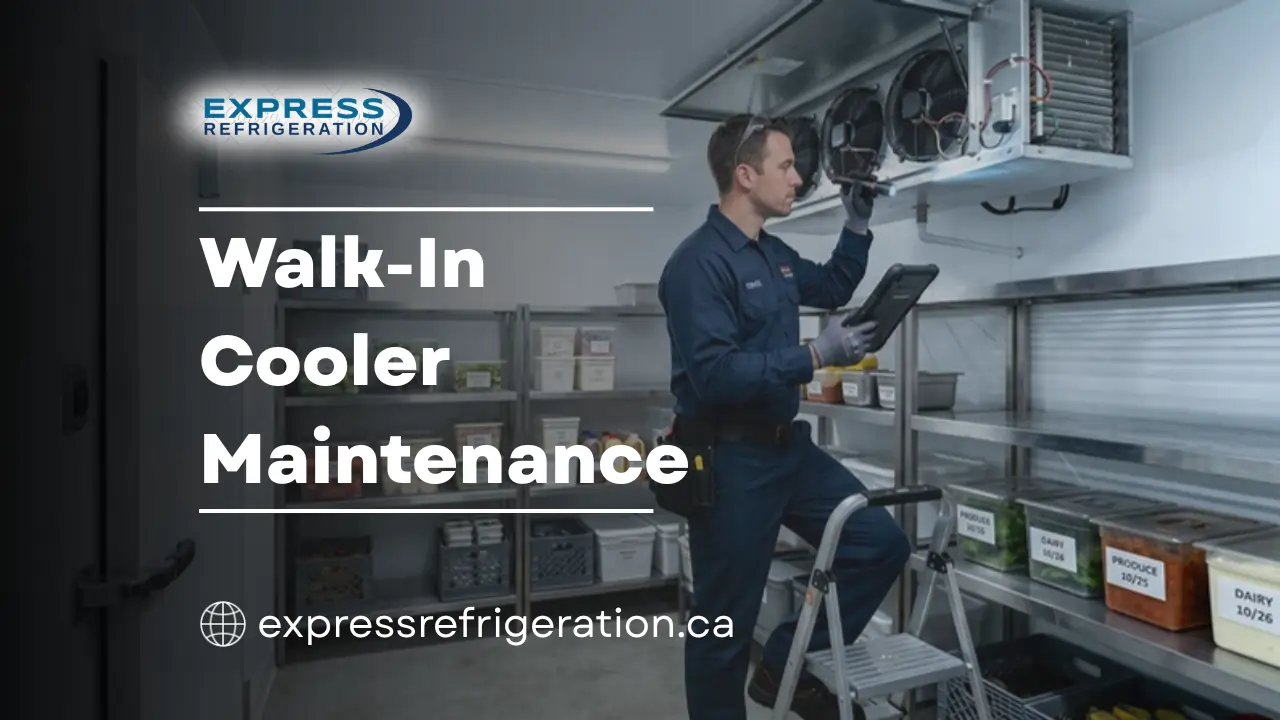
Quarterly Professional Service
Schedule a technician visit every 3-4 months for:
- Refrigerant pressure and charge verification
- Electrical connection tightening and testing
- Belt tension and condition (if applicable)
- Defrost system operation test
- Temperature calibration check
- Overall system performance evaluation
Annual Deep Service
Once yearly, invest in comprehensive service:
- Complete coil cleaning (including hard-to-reach areas)
- Lubrication of all motors and moving parts
- Refrigerant leak check with electronic detector
- Compressor oil level check (hermetic systems)
- Replacement of worn gaskets or seals
- Control system testing and calibration
Cost vs. Benefit: Preventive maintenance runs $150-$400 annually but prevents 60-70% of emergency breakdowns that cost $500-$3,000 to repair.
Frequently Asked Questions
Q: Why is my walk-in cooler warm at the top but cold at the bottom?
A: This indicates poor air circulation, usually from a failed evaporator fan motor or blocked air vents. Cold air naturally sinks, so without forced circulation, you’ll get temperature stratification. Check that fans are running and nothing blocks airflow. If fans operate but the problem persists, the motor may be running too slowly and needs replacement.
Q: How long can food stay safe in a commercial refrigerator that’s not cooling?
A: Food safety guidelines state perishables should not remain in the danger zone (41-135°F) for more than 4 hours total. If internal temperature rises above 41°F, start your 4-hour clock. Move high-risk items like dairy, meat, and prepared foods to working coolers immediately. Document temperatures for potential insurance claims.
Q: Can I add refrigerant myself to fix a commercial refrigerator not cooling?
A: No. Handling refrigerant requires EPA certification (Section 608) and specialized equipment. DIY refrigerant addition is illegal, dangerous, and will void warranties. Low refrigerant always indicates a leak that must be professionally repaired. Simply adding refrigerant without fixing the leak wastes money and harms the environment.
Q: What’s the average cost to repair a commercial refrigerator not holding temperature?
A: Costs vary widely by issue: simple repairs like thermostat replacement run $150-$350, fan motor replacement costs $300-$600, refrigerant leak repairs range $500-$1,200, and compressor replacement typically costs $1,500-$3,000. Service calls generally include a $75-$150 diagnostic fee, often credited toward repairs.
Q: Should I repair or replace my commercial refrigeration unit?
A: Use the 50% rule: if repair costs exceed 50% of replacement cost AND the unit is more than 10 years old, replacement is often smarter. Also consider: Is this a recurring problem? Are repair parts still available? Would a new unit significantly reduce energy costs? Get quotes for both options before deciding.
Conclusion
A commercial refrigerator not cooling doesn’t always mean expensive repairs or replacement. Many issues—from dirty condenser coils to incorrect settings—can be resolved with quick checks taking just minutes. However, knowing when to stop DIY troubleshooting and reach out for professional help protects both your investment and your inventory.
Start with the simple fixes covered in this guide. Check power, clean coils, verify settings, and ensure proper airflow. If basic troubleshooting doesn’t restore cooling within an hour, contact a certified refrigeration technician who can diagnose refrigerant issues, electrical faults, and component failures safely and correctly.
Remember that preventive maintenance is your best defense against surprise cooling failures. Regular cleaning, inspection, and professional servicing keep your refrigeration running efficiently year-round, reducing emergency repair costs and protecting your business.
Having persistent cooling problems? Consult a certified refrigeration technician for a professional check.